Screenshot is an essential way to describe a particular action in the form of a static image file. Screenshots are better than explaining with words. You can take screenshot Google Chrome and share images with friends on social media, display the appearance of the software, easily demonstrate a function in software tutorials, and for problem solving, as well as technical support, display the error messages and error codes with the help of screenshots. These are also valuable to save snippets displayed on the screen that are hard to print.
To take a screenshot of your screen, no specific software is required. This facility is embedded by default in all the OS. It is very easy to capture a screenshot. Taking screenshots varies in different brands. Let us learn how to screenshot on Google Chrome on different devices.
How to Take Screenshot on Google Chrome?
In the upcoming sections of this post, we will teach you how to take a screenshot on Google Chrome on multiple devices such as, Android devices, Acer laptops, HP devices, Asus laptops, Samsung Chromebook, etc. For every device, we have added the instructions too. So, let’s read on!
How to Take a Screenshot on Google Chrome Windows 10?
Do you have a Windows 10 computer or laptop but have no clue how to take a screenshot? You can find help here. The procedure for screenshot Google Chrome Windows 10 can be performed with no difficulty. Here are 6 easy steps that you can follow to capture the screenshot on your Windows 10 system.
1. Open Google Chrome on your Windows 10 system.
2. Go to the site you want to capture.
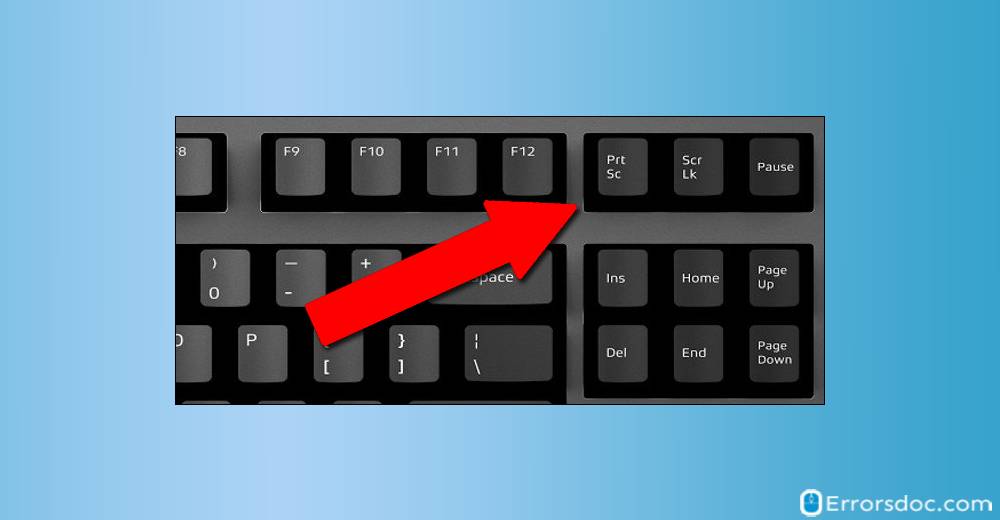
3. On your keyboard, press the “PrtScn” key.

4. The screenshot will be captured and copied to your clipboard. It will not be saved as a file.
5. Paste the screenshot on the platform you want to. Or share it by pasting it on the sharing platform.
6. In case you want to edit the screenshot captured, open the image editing tool and paste it there. Then edit it as required and save it in the form of a file.
How to Take Screenshot on an Android Device?
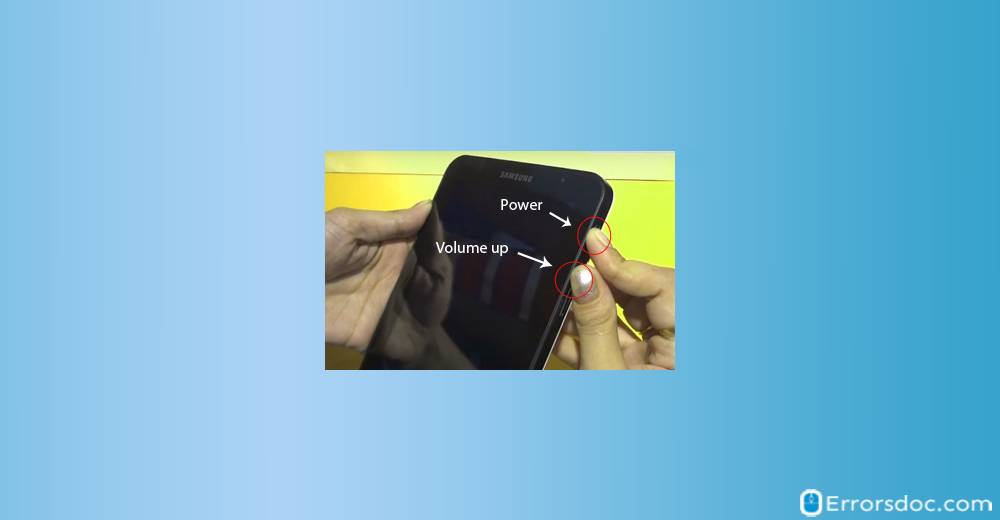
To take screenshot Google Chrome on your Android device, you can follow the simple procedure we have shown here. Interestingly, for this procedure, you will not require any Google Chrome screenshot extension. You can capture the screenshot easily with the power and volume buttons of your Android device. See the steps below to use these buttons for taking a screenshot.
1. Go to the website of which you want to take a screenshot.
2. Hold the “Power” tab for at least 30 seconds
3. Then click on “Screenshot”.
4. In case it does not function, hold the “Power” and “Volume” tabs simultaneously for at least 30 seconds.

5. The screenshot will be taken by your device successfully. You will have to save it.
6. You can view the screenshot captured at the top of the screen.
How to Take Screenshot on the Chrome OS?
Here is an effortless method to take a screenshot on a Chrome OS. Learn how to do a screenshot on Google Chrome OS in just 3 really quick steps.
1. Open the website of which you want to capture a screenshot.
2. Then hold the “Ctrl + Switch” window keys together.
3. Screenshot will be taken and automatically saved as a PNG file in your “Downloads” folder.
How to Take Screenshot on Acer Laptop?
Are you looking for the easiest way to capture Google Chrome screenshot page? You can definitely try this one. You can easily take a screenshot with the implementation of the free online tool, Apowersoft Free Screen Capture. Follow with the below-mentioned steps to take the screenshot on your Acer laptop.
1. Visit the website of Acer screenshot application.
2. Hit the “Launch Application” tab and go according to the tips to execute the tool.
3. When it appears, view the things to be captured in the screenshot and then click on the “Camera” icon on the interface of this tool.
4. You can also press the “PrtSc” key to get the screenshot.
5. Soon after that, the mouse cursor will change to a blue crosshair.
6. To capture and validate the screenshot, you will need to click, hold and drag your mouse.
7. Two toolbars will be displayed. These will allow you to comment on the screenshot prior to saving it.
8. Finally click on “Save” to keep the screenshot on your local disk.
How to Take Screenshot on HP Laptop and Computer?
Do you know the simplest screenshot shortcut Google Chrome for HP laptops and computers? We know and would love to share it with you. HP Pavilion computer has a default key for the print screen function. In the top row, the function keys can be viewed and are labeled as “PrtSc”, “Prt Scrn”, or a similar variation. You can easily take a screenshot on your HP Pavilion just by holding the print screen key. Instantly, the image will get copied and saved in your clipboard which you can see on your screen. To retrieve your screenshot you need to hold the “Ctrl”+”V” keys simultaneously. This will permit you to paste the screenshot on any program that can accept images.
How to Take Screenshot on Asus Laptop?
For the Asus users, here is one excellent procedure for how to screenshot on Google Chrome laptop. Taking a screenshot on your Asus laptop is an easy task. You can do with the help of the Apowersoft Screen Capture Pro tool. This tool is considered as an excellent tool that can be used to take screenshots on Asus devices with Windows OS. Consider the steps given below to learn how to take a screenshot on your Asus device.
1. First, you need to download, install and launch the “Apowersoft Screen Capture Pro” tool successfully on your Asus device.
2. Go to the screen that you want to capture in the screenshot.
3. Follow the interface of the screenshot program.
4. On the right hand side, click on the big camera icon.
5. Now, press the hot key of “Print Screen” or “PrtSc”.
6. Thereafter, you can view a blue crosshair.
7. To choose a region and confirm the screenshot, you need to click, hold and drag your mouse.
8. Then the “Image Editor” will turn up. You can make some parts hazy, add lines, arrows, and texts on the screenshot as needed.
9. Finally, click the “Disc-like” button to save it on your local file. Also, you can directly copy, email, share, or upload it.
How to Take Screenshot on Samsung Chromebook?
In this section, we will look at the different ways of capturing a screenshot on your Samsung Chromebook. There are two procedures for screenshot capture Google Chrome on your Samsung device. These procedures include taking the screenshot of the complete display and taking a partial screenshot.
Take a Screenshot of Complete Display
For Google Chrome screenshots screen capture for complete display, you can follow these 4 steps.
1. Go to the screen that is needed to be captured.
2. Search the “Control” and “Switch” windows tabs.
3. Hold the “Control” and “Switch” windows tabs simultaneously.
4. The screenshot will be captured in just a second. It will give a preview of the screenshot in notifications.
Take a Partial Screenshot
To capture a partial screenshot from Google Chrome on your Samsung Chromebook, you can take a look at the 6 clear steps given below.
1. Find and confirm the screenshot screen or content.
2. Search the “Control”, “Shift”, and “Switch” windows buttons.
3. Simultaneously, hold the “Control”, “Shift”, and “Switch” windows buttons.
4. Check that the screen brightness is fine and your cursor should change into a “+” icon.
5. Press down and drag out a box the screen you want to capture.
6. And the screenshot will be captured within a second along with a preview of the image or text that is prompted in the notification window.
Our Final Thoughts
In this blog, we came across awesome screenshot Google Chrome methods for various devices. Without the use of any Google Chrome website screenshot extension or screenshot plugin Google Chrome, we helped you capture the screen on your device. Which screenshot method did you enjoy the most? Do let us know in the comment section below!
Explore more amazing methods and solutions with ErrorsDoc. Read our post on how to flip computer screen for more cool stuff!
