Cox webmail is one of the subsidiaries of Cox Enterprises that is counted among the largest data service providers. The network coverage is so massive that the company can be 3rd in the state. As its email site provides many easily accessible features along with huge storage for the data, users tend to get attracted to it. To start sending or handling emails, it is necessary to create an account first. Once created, the Cox email login process can be executed through the official website.
At times, when you sign in to your Cox email account, you may run into certain errors. Despite these, you can access your account by applying some measures. You only need to know the source of the errors and implement the measure as per them.
How to Create an Email Account on Cox?
Users can create a Cox email account by proceeding to its official homepage through the browser. When you finally reach here, you need to look up the No Account? Register Now! option. Then you are required to choose any one of the options present on the screen for registering your account. The verification code will be directed to the one you opt for. After this, the process of making the account will soon be over.
- Open the official link of the email service provider given below:
- Tap on “No Account? Register Now!”.
- Opt among the following options through which the registration can be done:
- “Phone Number”
- “Email Address”
- “Account Number”
- A verification code will be sent on whichever option you choose. Type it.
- Then mention the “User ID” that you need.
- Provide a password.
- Next, you will have to fill up the required information:
- “Email Address”
- “Select a Security Question”
- “Security Answer”
- Proceed to “Complete Registration”.
Your new email address for Cox will now be created. You can sign in to the account and look up for sending and receiving emails.
How can I Log in to My Cox Net Email Account?
Through cox.net, email account login can be done with ease. You will have to open the login page by clicking on its direct link. You need to remember the latest User ID and password while signing into your email account. The Remember Me checkbox can also be ticked if you want the system to store the login details.
- Tap on the given link:
- On the login page, type the “User ID” and the “Password”.
- Then checkmark the box beside “Remember Me”.
- Select “Sign In”.
- Now, you can access your email account.
What are the Causes for Cox Email Login Problems?
Being in a hurry to log in, you might end up filling in the wrong credentials for your account. They might also be inaccurate if you have forgotten them. When the system does not find the User ID and Password the same as entered while registering, it can display a message stating “The Username or Password for Cox is Incorrect”. Alike this cause, there can be several others that may hamper the Cox email account login from processing.
- Slow data connectivity may be the reason for a login error.
- Antivirus and Firewall Protection may obstruct the process.
- An issue in the SMTP settings can generate a problem as well.
- Trouble during logging in can be faced because of the Port Number too.
How to Solve the Cox.net Email Login Error?
On cox.net, the email Login Page may stop working suddenly. It can be an indication of an error. Although there can be different reasons behind the error, you can eliminate it with the best possible fix. Switching the port number can help you in coming out of the problem. Also, you may undergo conditions where you are unable to remember the password of your email account. Here, setting up a new password can do the needful.
Fix 1: Changing the Port Number
Port Numbers in your email account can help you in identifying a particular process that utilizes the internet or some other network for communication. However, sometimes because of some issue in it, an obstacle can be built that may not allow the Cox email login to work. In such a condition, the port number can be changed. You need to opt for the Mail button and after that, head towards the Preferences option. Next, you are required to go for the Accounts tab. Here, you can start making the changes.
- Move to the “Mail” tab.
- Then click on “Preferences”.
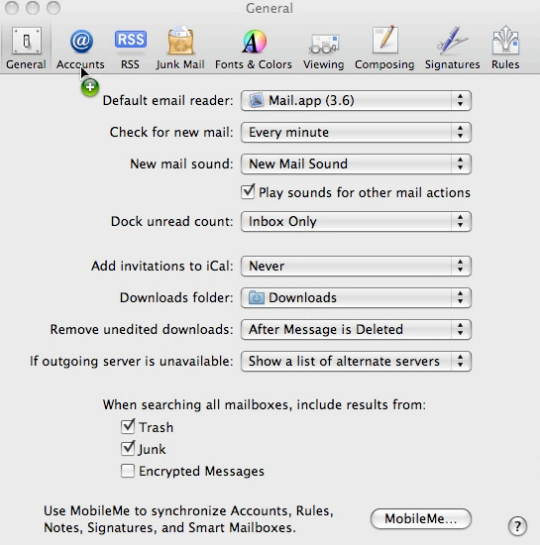
- Opt for “Accounts”. The details of the account will appear on the screen.
- In the “Advance” section, go to the “Port” field.
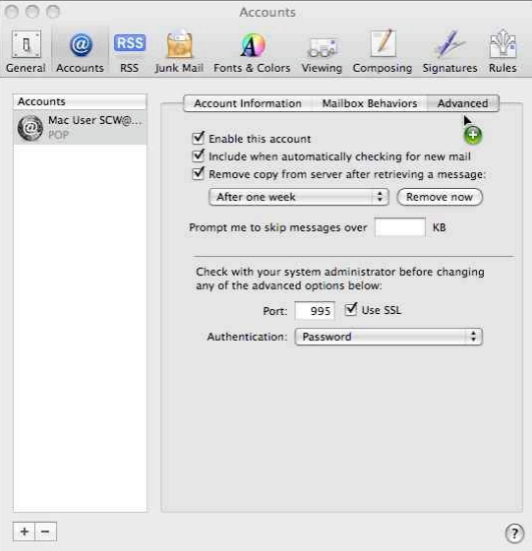
- Here, remove “995” and add “110”.
- Then put a tick beside the checkbox of “Use SSL”.
- Now, through the “Red” tab at the top, close the page.
- Push the “Save” option.
After completing the fix, you need to go back to the cox.net email’s Login Page. Enter all the required credentials and try signing in to your account.
Fix 2: Setting a New Password
Sometimes, unknowingly, you may set such a password that becomes difficult to remember. This may create a problem at the time you try to sign in to your email account. Thus, you can overcome this issue by resetting the password. On the page of Cox email login, the Forgot Password option is to be found and clicked. To change it, enter your Cox User ID. Then opt for any one recovery option among the given ones.
- Visit the cox email page by clicking on:
- Next, press the “Forgot Password” option.
- For resetting the password, the “Cox User ID” is to be typed.
- Find and click on the most suitable option of recovery among the following:
- “Text Me”
- “Answer Security Question”
- “Send Email”
- Once your verification is done through the option you choose, a new password is to be created.
- Again key in the password for the confirmation and save it.
Your new password will be set. Thus, you can navigate back to the sign-in page and enter the credentials required. Now, log in to the Cox email account and check if the issue has been resolved.
Fix 3: Checking the Internet Connection
Poor internet connectivity can create obstacles while you are signing in to your email account. This can stop the Cox email Login Page from loading. Hence, to clear the trouble, it is recommended to check your data connection. If the problem persists, then you can restart your router or contact the internet service provider (ISP) for the solution.
Fix 4: Re-Entering the Account Details
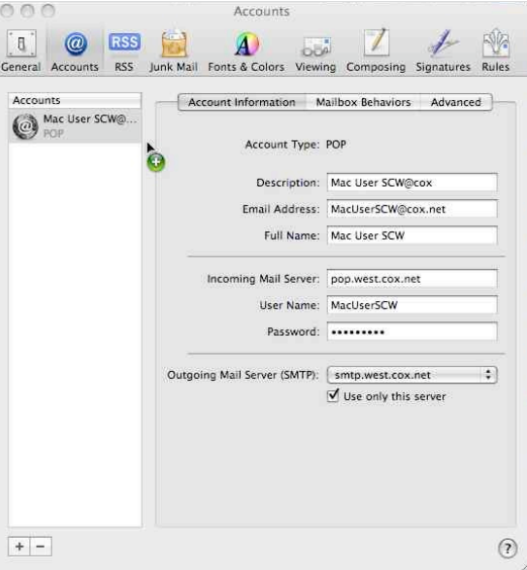
The Cox email login window might cause an issue during the sign-in process because of certain instances. So, to get rid of it, you can enter all the information of the account again. In this procedure, the Mail tab is to be selected, followed by the Preferences button. When the window with the section of Account Information pops up, the – button needs to be tapped to add the details again.
- Proceed to the “Mail” button.
- Choose the “Preferences” option.
- Your account details will come up in the window.
- In the “Account Information” section, find and click on the “–” tab.
- The “Welcome to Mail” page will be opened.
- Fill in the details in this step.
- Press “Continue”.
- After that, re-enter the information in the following sections:
- “Account Information”
- “Mailbox Behaviors”
- “Advanced”
- Now, sign in to your account to confirm the fix.
Tip: Even after executing the above method if you face the problem, then change the port from 995 to 110 in the section of Advanced.
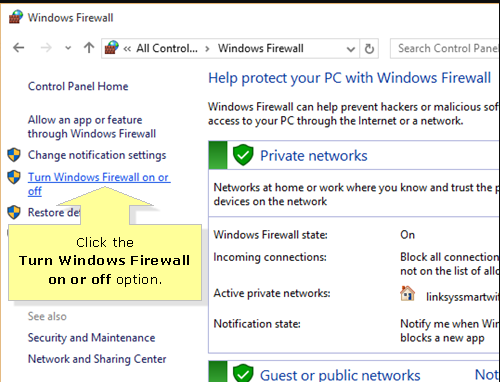
Fix 5: Turning off Windows Firewall Protection
The page might hang when you attempt to log in to the Cox email account. This situation can take place due to some error in the firewall protection. To solve this, you can switch it off from the Control Panel on the computer. You will find the Windows Firewall button here. Tap on it and move to the Turn Windows Firewall On or Off tab. Now, from the page of Customize Settings, select Turn Off Windows Firewall on both Private and Public Network Settings sections, and after that push Ok.
- Press the “Windows” tab on the keyboard.
- Enter “Control Panel”.
- Then tap on its icon appearing on the screen.
- Choose the “Windows Firewall” option.
- Press the “Turn Windows Firewall on or off” button on the left.
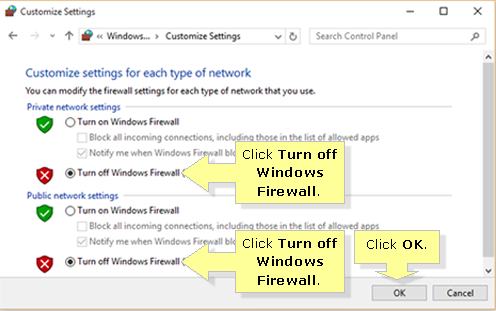
- The “Customize Settings” window will come up.
- Opt for “Turn off Windows Firewall” for the following sections:
- “Private Network Settings”
- “Public Network Settings”
- Hit “Ok”.
This will turn off the Firewall. Now, you can head to the site of Cox mail login and perform the sign-in.
Note: This method is applicable for the users of Windows 10.
Fix 6: Switching the SMTP Server
The Simple Mail Transfer Protocol (SMTP) server is an ISC (Internet Standard Communication) protocol that is responsible for sending and receiving emails from the account. No matter how important this application is, at times it can create trouble performing the Cox email login. The process to fix it can be carried through the Settings of the mail. You need to look for the Outgoing SMTP server and its settings as well. Next, the present Outgoing Port is to be verified and switched to 587.
- Go to the settings of “Cox Email”.
- Find the “Outgoing SMTP Server” along with its “Settings”.
- Then verify the latest “Outgoing Port”.
- It needs to be changed to “587”.
- After that, enter the “Username” and “Password” in the field provided.
- Save these changes.
Now, open the cox.net email’s Login Page. Sign in to your email account and verify the fix.
To Sum up
Logging in to your Cox email account is a simple and easy process. The account creation and sign-in process were focused in the blog along with the ways that can help you in fixing a login issue. Irrespective of the process or fix you administer, ensure that the instructions are properly followed.