Once you are aware of the virus threats to the system you are using, you will have to install antivirus software. But what if the antivirus you are using starts to showcase some errors? You will have to uninstall the antivirus and install the latest version. In case you are a user of Webroot Secureanywhere, then you must have faced the issue where the antivirus must have displayed some running issues. Just uninstall Webroot Secureanywhere in order to get rid of such an issue. But to Uninstall Webroot Secureanywhere, you must know the steps to execute the procedure. Scroll down to know how to completely Uninstall Webroot Secureanywhere from Mac, Windows 7 and Windows 8.
Uninstall Webroot Secureanywhere Mac:
Get rid Webroot Secureanywhere on Mac by following the steps mentioned below:
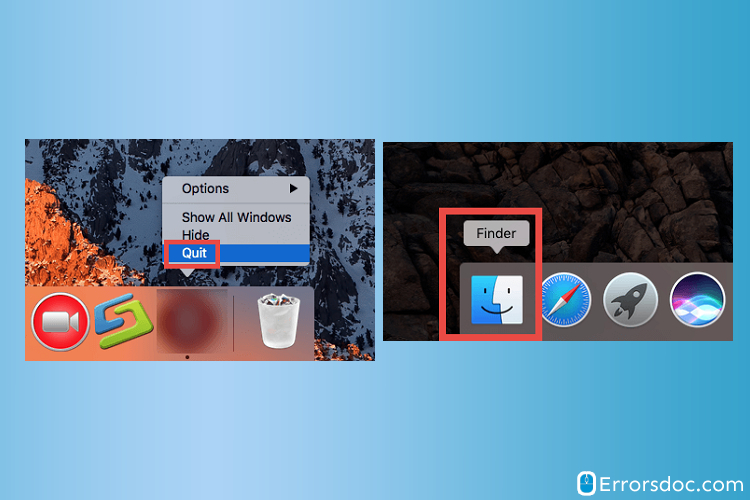
- Step 1: You must ensure that there is no Webroot SecureAnywhere Antivirus process running on the system. If there is any process running, just close it by quitting.
- Step 2: Now you must launch the finder on the Mac
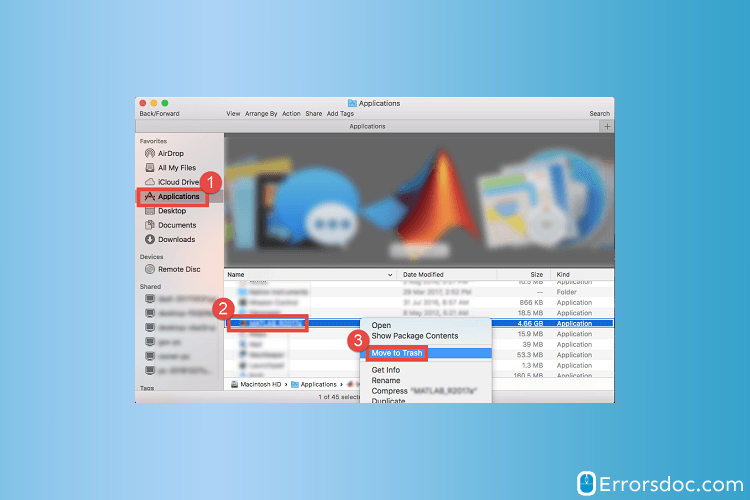
- Step 3: Make a selection on Applications in the Finder sidebar
- Step 4: Locate the Webroot SecureAnywhere AntiVirus under the Applications folder
- Step 5: Now hold on to the icon of the antivirus and start dragging it towards the trash can icon and release it there. Apart from that, you can also right-click on the icon of the antivirus and select on the option of “Move to Trash” that must be there on the sub-menu.
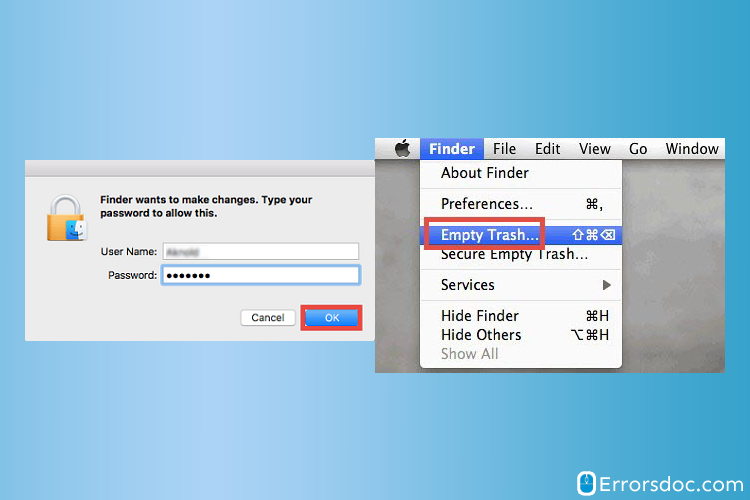
- Step 6: In case you get prompted, you just have to enter the administrator password. Make a selection on Ok in order to save the changes
- Step 7: Select the Finder and Empty trash that are there on the Menu bar. Apart from that, you can also right-click on the Trash icon and go for the option of ‘Empty trash”. Now you can select empty the trash once more in the pop window.
- Step 8: Another option that is available for you is that you can also trash the Launchpad interface along with the process. When you get prompted to enter the administrator password in order to process the procedure further, the removal of the app will be taken place permanently. You will not be able to undo this action so make sure you do take the step carefully.
Note that some users may want to reinstall a fresh and updated version of their system for which there should be no traces left behind of the Webroot antivirus installed earlier. Sometimes the support files may cause an issue while you wish to install the new version.
Continue to execute the steps mentioned below for the same|Uninstall Webroot Secureanywhere Mac
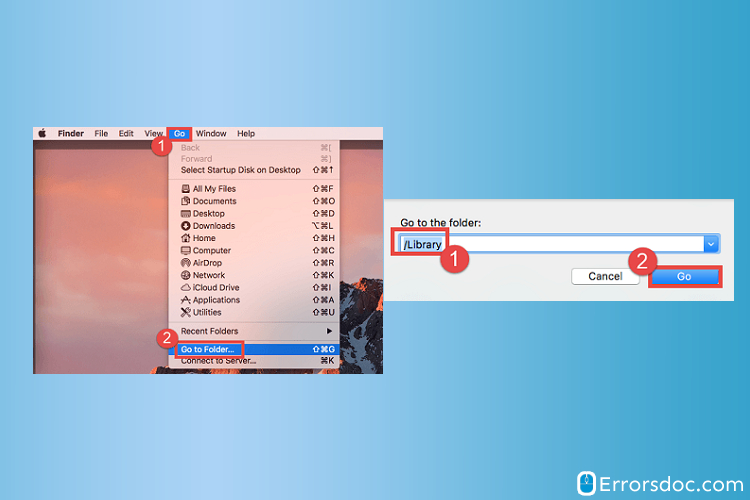
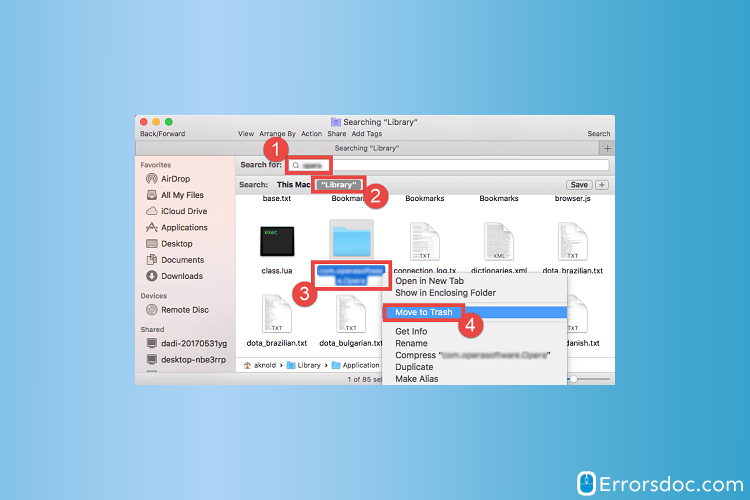
- Step 9: Make a selection on the Icon of Finder in the Dock to open Finder
- Step 10: now hit the option of “Go to folder” that is under the “GO” tab in the menu bar
- Step 11: After you make a selection on the “Go to folder”, you will have to type “/Library’ in the search box that is in front of you
- Step 12: In the Library Folder you will have to type the keywords of the Webroot SecureAnywhere Antivirus. You can also type the name of the vendor of the antivirus and then hit the Library option.
- Step 13: Now you must find the matched items from the list in front of you that has appeared. Once you s[pot them, right-click on them and select the option of “Move to Trash”
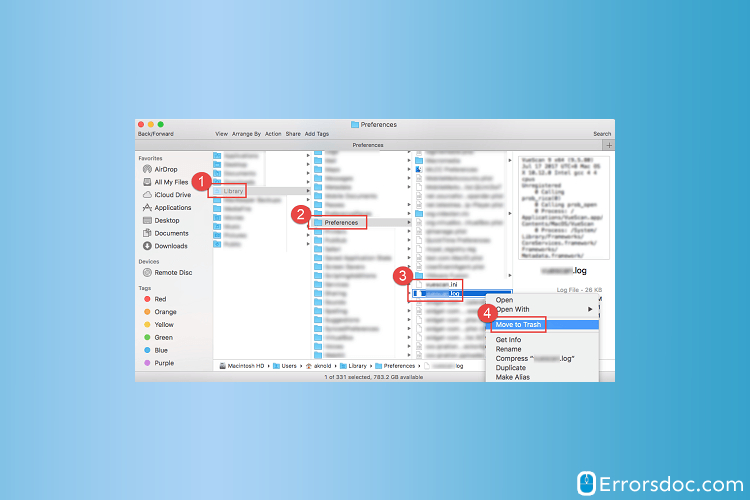
- Step 14: You can repeat the steps in the Library Directory in order to delete the traces of the Webroot SecureAnywhere Antivirus
- Step 15: Now you will have to delete any related item to Webroot SecureAnywhere from the Hard Drive and Home Folder to get rid of it completely. You can find junk files in the directories mentioned below:
- /Library
- ~/Library
- /Library/Application Support
- ~/Library/Application Support
- /Library/Preferences
- ~/Library/Preferences
- /Library/Caches/
- ~/Library/Caches/
- /Library/LaunchAgents
- ~/Library/LaunchAgents
- /Library/LaunchDaemons
- ~/Library/LaunchDaemons
- /Library/PreferencePanes
- ~/Library/PreferencePanes
- /Library/StartupItems
- ~/Library/StartupItems
Follow the steps mentioned below if you feel that it is a task to hunt down these files manually because it actually is. We recommend you to install the Osx Uninstaller to make the job easier. This will help you save time and do the task appropriately. To install the Osx Uninstaller stick to the following steps:
- Step 1: Turn On the system
- Step 2: Make sure you have an internet connection
- Step 3: Go to the official website of Osx Uninstaller and locate the Download button or Link
- Step 4: Once you download the file of Osx, make sure that Webroot SecureAnywhere is not running on the system. In case it is, then shut it immediately.
- Step 5: Now launch the Osx Uninstaller
- Step 6: Make a selection on the Webroot SecureAnywhre in the interface, then go for the Run Analysis in order, to begin with, the scanning
- Step 7: Now make a selection on the option of “Complete Uninstall’ and then go for the option of “Yes’ to execute the Uninstallation process
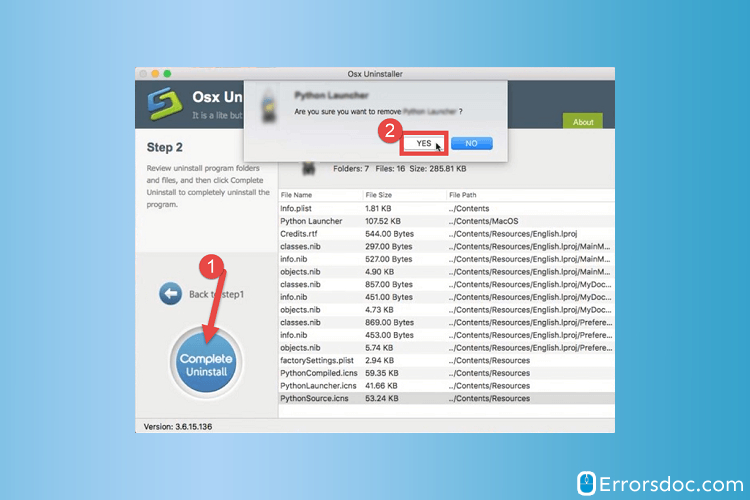
- Step 8: You may select on the Interface back to Re-scan Mac and exist the Osx Uninstaller
- Step 9: Follow the on-screen instructions to execute the whole process within no time. This process will help you to fix issues of Mac.
Using the above steps you can uninstall Webroot Secureanywhere Mac completely.
Uninstall Webroot Secureanywhere Windows 8:
- Step 1: Turn ON the system and execute the steps mentioned below:
- Step 2: go to the option of “Start” that is on the extreme left corner of the screen
- Step 3: Now locate the Control Panel on the right-hand side of the panel. In case you are not able to do so, type “Control Panel” in the search box that is on the screen.

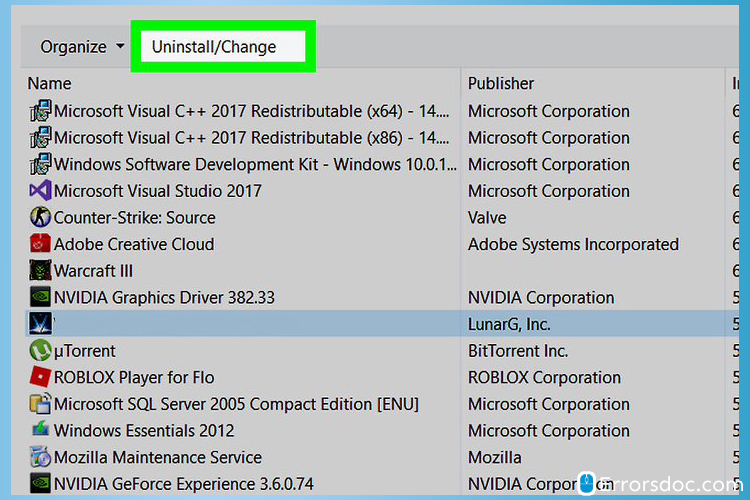
- Step 4: Go for the Program to Open Programs and Features Panel
- Step 5: Now look for the Webroot SecureAnywhere Antivirus
- Step 6: Click on the Uninstall option to get rid of the application at once
- Step 8: Make a selection on Yes, once you see the message of “Are you sure you want to uninstall”
- Step 9: You will be able to Uninstall webroot Secureanywhere windows 8
This process will help you to fix issues of Windows 8.
Uninstall Webroot Secureanywhere Windows 7:
- Step 1: Turn ON the system and execute the steps mentioned below:
- Step 2: go to the option of “Start” that is on the extreme left corner of the screen
- Step 3: Now locate the Control Panel on the right-hand side of the panel. In case you are not able to do so, type “Control Panel” in the search box that is on the screen.
- Step 4: Go for the Program to Open Programs and Features Panel
- Step 5: Locate the “Webroot SecureAnywhere Antivirus” and then hit the option of Uninstall option
- Step 6: After this, you must have been able to uninstall the “Webroot SecureAnywhere Antivirus”
how to uninstall Webroot Secureanywhere Mac We hope that you must know how to uninstall Webroot Secureanywhere Mac as well as on windows 7 and 8. Just in case you still do not know, you can get in touch with a professional. The expert assistance at ErrorsDoc is well-versed with such issues and can provide quick solutions via chat. The entire process is both time and money-saving. Apart from that, you can also contact us regarding any other laptop and software issue.