Is the Windows error 0x80070643 stopping you from installing the updates? Allow us to rescue your Windows 7 and Windows 10 computer from this update error. Our methods to fix the error 0x80070643 Windows 10 and Windows 7 are quick, simple, and require no technical expertise. Along with the fixes, we will also share with you the reasons why this error code occurs on your Windows 10 or Windows 7 computer.
So, let’s get started!
What is Windows Error 0x80070643?
The Windows 0x80070643 is an error that emerges due to some fault in the system settings. This fault occurs when the configuration has not been done in the correct manner. This error can be commonly found on Windows 7 and Windows 10 computers.
What Causes the Error 0x80070643 Windows?
The 0x80070643 Windows update error may be occurring on your computer due to one of the following reasons.
1. This error will emerge when the Windows Installer service is not running on your computer.
2. Ensure that you have the latest version of the .NET Framework on your system. If not, you may face this error code.
3. Certain files on your Windows 10 or Windows 7 computer can become corrupt and then be the source of this error code.
4. If you have an antivirus installed on your computer, it may interrupt the process of the Windows update. This interference can cause the error 0x80070643 on your system.
5. This error code can be generated on your system due to a faulty or extremely slow internet connection.
How to Troubleshoot Error 0x80070643 Windows 10?
We are here to help you out with the Windows 10 defender error 0x80070643 in 10 different ways. In these 10 methods, you will get to know the procedures for running the Windows installer service, starting your Windows 10 computer in the start-up mode, and downloading the recent .NET framework. We will also show you how to run the SFC scan, install the Windows updates manually, and other such methods to remove this error code from your Windows 10 PC.
Method 1: Ensure that Windows Installer Service is Running
The error 0x80070643 code will not be visible on your computer when the Windows Installer service is running on it. So, when you see this error, you should check whether this service has been disabled and then enable it to resolve it quickly. Here, you can discover the 9 steps for checking whether the Windows Installer service is running.
1. Click on “Start”.
2. In the “Search programs and files” box, type in “services.msc”. Then press “Enter”.
3. Right-click on “Windows Installer” and click on “Start”.
4. If “Start” and “Stop” are unavailable and only “Restart” is available, then you can be sure that the service has been started.
5. On the “Services” page in the “File” menu, click on “Exit”.
6. Now, press the “Windows” key and open “Run”.
7. Type and enter “cmd” in “Run”.
8. Type in “MSIEXEC” or “REGSERVER” and again the press “Enter” key.
9. Finally, install “Microsoft Security Essentials” again.
Method 2: Start Windows in Selective Start-up Mode
When you start your Windows computer in the selective start-up mode, you may be able to escape the error code 0x80070643. To perform this method successfully, you can consider the 6 steps given below.
1. Click on “Start”.
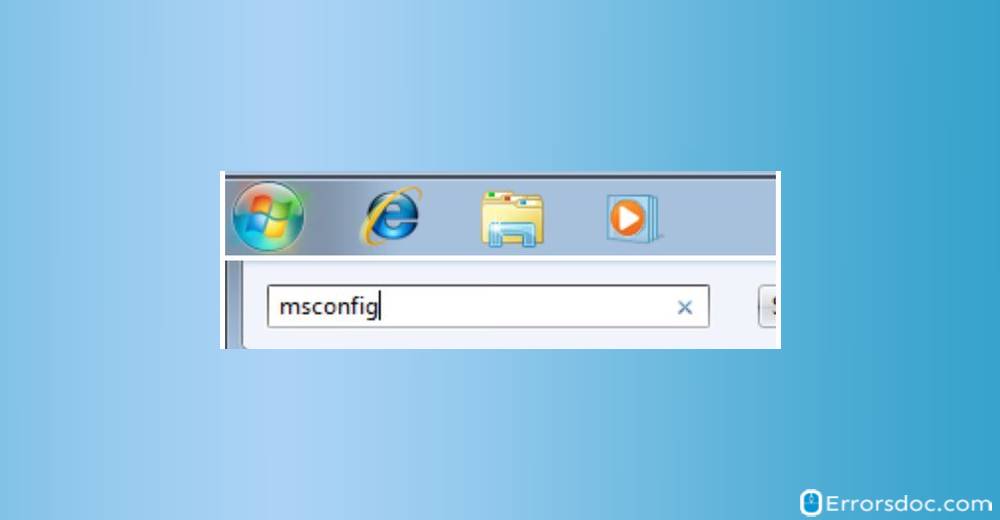
2. In the “Search programs and files box”, type in “msconfig” and click on it.

3. In the “General” tab, click on “Selective startup”, and clear the “Load Startup Items” checkbox.
4. In the “Services” tab, click on the ‘Hide All Microsoft Services” checkbox, and clear all the checkboxes for the services that are already on the list.
5. Click on “Ok” and then click on “Restart” to restart your Windows computer.
6. Try to install “Microsoft Security Essentials” again.
Method 3: Download Latest .NET Framework on Windows
Do you have the latest version of the .NET Framework on your Windows computer? If not, you should update it right now. It will prevent the Windows update error 0x80070643 when you are downloading Windows updates. For getting the latest version of the .NET Framework, you can go through the 5 steps mentioned in this section.
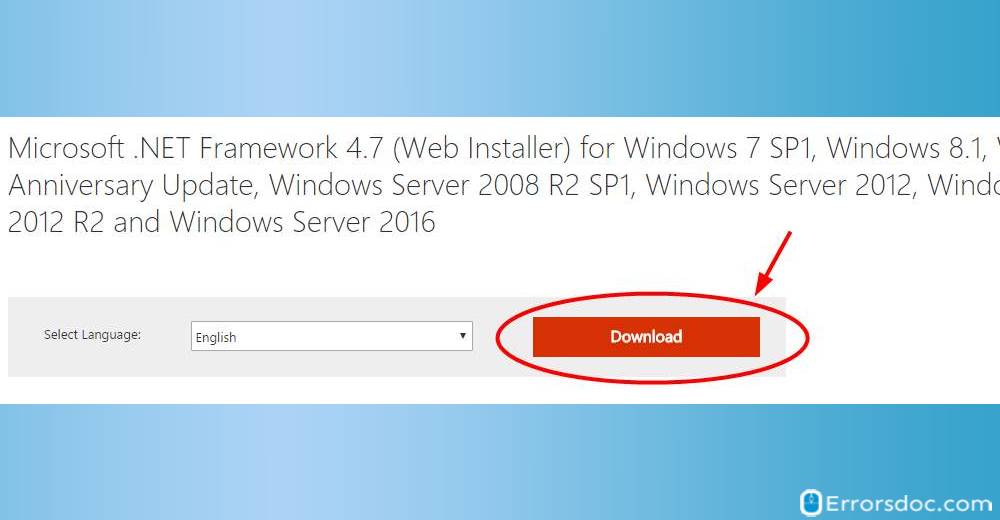
1. On your browser, open the website of .NET Framework download.
2. Select the latest version and then press “Download”.

3. Click twice on the file when the download is complete.
4. To install the file, read the instructions on the screen and then perform them.
5. Now, try to update Windows after the latest version of .NET Framework has been installed.
Method 4: Try Running SFC Scan on Windows
Installing the updates for your Windows computer can get interrupted because of any corrupt files. As a result, the 0x80070643 Windows update error may emerge on your system. You can use the SFC scan for identifying the corrupt files and replacing them. While many of you may be familiar with the procedure to use the SFC scanning tool, for those who need help we have listed the steps below.
1. Open the “Start” menu.
2. Type in “cmd” in the search box.
3. Choose “Command Prompt” from the menu. Right-click on it for running it as administrator.
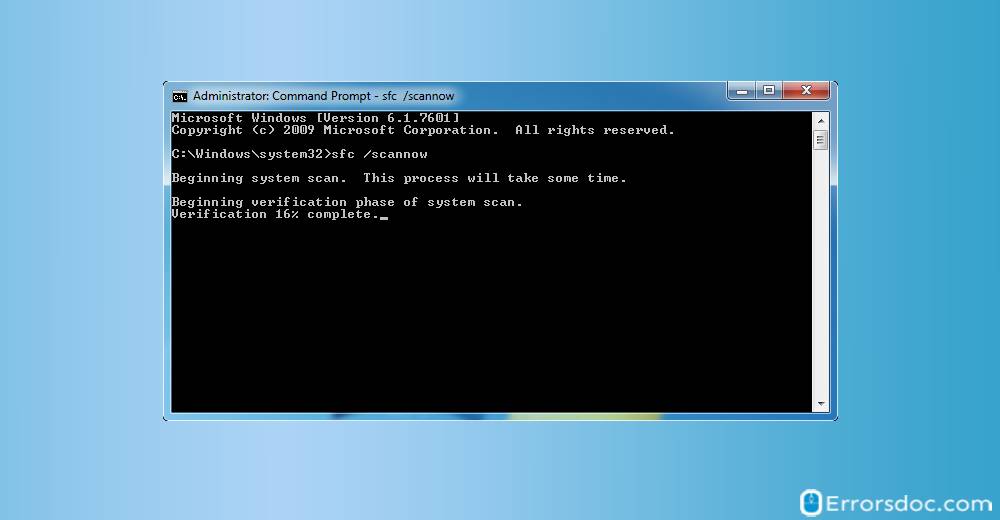
4. Type in “sfc/scannow” in the “Command Prompt”. Then hit the “Enter” key.

5. When your system has been scanned, you can install the updates for your system.
Method 5: Update Windows Manually
The chances are low that your system will be affected by the Windows update error 0x80070643 when you are installing the updates manually. Let us read the 8 steps given below for updating your Windows system manually.
1. On your Windows computer, right-click on “Computer”/“This PC”.
2. Choose “Properties”.
3. When the “System” window opens, locate “System type”. Ensure that the operating system is 64-bit (x64-based) or 32-bit (x86-based).
4. The next step involves opening the Windows update.
5. Copy the codes beginning with “KB” for the updates that failed.
6. Now, open the “Microsoft Update Catalog”. Paste these codes and press “Search”.
7. Choose a suitable update for the operating system and then press “Download”.
8. When the file has been downloaded, run and install the update.
Method 6: Install Windows Defender Antivirus Updates Manually
While you are installing the updates for Windows Defender antivirus, you may find the message “definition update for Windows defender kb2267602 error 0x80070643” on your screen. In such a situation, we will suggest you manually install the updates for it. Here is the best 5-step procedure you can try for installing the Windows Defender antivirus updates manually.
1. Open the Microsoft website for Windows Defender Antivirus update.
2. Locate the update file for “Windows Defender Antivirus”. Download the version that is suitable for your Windows operating system.
3. Click on the file after it has been downloaded. Then install it.
4. Now, restart your Windows PC.
5. The final step involves running the Windows update. The Windows Defender error 0x80070643 will have been fixed.
Method 7: Try Disabling Antivirus Temporarily on Windows 10
The Antivirus software of your Windows 10 computer interfering with the updating procedure is not unusual. In such a situation, you may encounter the error 0x80070643 Windows 10 update on your system. Therefore, disabling the Windows 10 antivirus software permanently will work great in removing this error code. Scroll down to find the steps for performing this method.
1. Press the “Windows” key.
2. Type in “Windows security” in the search box. Then hit “Enter”.
3. Next, tap “Virus & threat protection”.
4. Now, go to the “Virus & threat protection settings”.
5. The fifth step is to tap “Manage settings”.
6. In the “Real-time protection” option, press the toggle button for permanently disabling the “Windows Defender Antivirus”.
7. You may be asked to provide confirmation for making this change. Press “Yes”.
8. Now, install the updates on your system. The Windows Defender update error 0x80070643 will not show up anymore.
9. When the Windows updates have been installed, you can enable the antivirus software again. For this, press the toggle button.
Method 8: Restart Windows 10 Computer
Restarting your Windows 10 computer is the number 1 solution for many problems. Restarting it can help in resolving the 0x80070643 Windows error as well. The procedure to do so is very simple and can be completed in just 4 short steps.
1. First, save all the work you were doing on your computer.
2. Go to the “Start” menu on your Windows 10 computer.
3. Press the “Power” icon located at the bottom.
4. Click on “Restart”.
5. When your computer has been restarted, try using your system and check whether the Windows update error persists.
Method 9: Check Internet Connection on Windows 10
Do you have a faulty internet connection? Or is your internet connection too slow? When you don’t have proper internet services on your Windows 10 system, you will be bothered by the error 0x80070643 Windows 10. We will suggest you test your internet connection and make sure that it is working. If the internet services are not up, then you will be required to get in touch with your internet service provider.
Method 10: Use Windows Update Troubleshooter on Windows 10
The Windows Update Troubleshooter is an excellent tool for eliminating errors like the Windows update error error 0x80070643. To use this tool in the right way, you can take a look at the 5 simple steps given as follows.
1. On your Windows 10 PC, go to the “Settings”.
2. Click on “Update & security”.
3. The third step is to click on “Troubleshoot”.
4. Then tap “Windows update”.
5. Finally, click on “Run Troubleshooter”.
The Windows Troubleshooter will take some time to identify the problem that is generating this error code. Once the error has been identified, the Windows troubleshooter will fix it.
How to Troubleshoot Error 0x80070643 Windows 7?
When your Windows 7 computer is bugged by the Windows update 0x80070643 error, you can try out the 3 superb methods given below. These methods will enable you to disable certain services like the Background Intelligent Transfer Service to fix the problem. You will also get to know the procedures for accessing the administrator permissions to install the updates on your Windows 7 system without any glitches.
Method 1: Stop Certain Services on Windows 7
In this method, we have shown the procedure for stopping the Background Intelligent Transfer Service as well as the Windows update service. Then you can install the updates again without the 0x80070643 Windows 7 error interfering with the procedure. This method can be administered in 9 steps.
1. On your Windows 7 computer, search for “Services”.
2. In “Services”, click on “Background Intelligent Transfer Service” from the list.
3. Right-click on “Background Intelligent Transfer Service” for stopping it.
4. Next, in the same list, search for “Windows update”.
5. Right-click on “Windows update” for stopping it.
6. Click on “File Explorer” for opening it.
7. Paste “c:\Windows\SoftwareDistribution\Download” in the “File Explorer”.
8. Empty the contents of this folder. Doing so will remove the recent Windows updates.
9. Exit the folder and install the Windows update once again. You will not be bothered by the Windows update error now.
Method 2: Give Access to Administrator Permissions on Windows 7
In this method, we will help you know how to remove the Windows update install error 0x80070643 by giving access to the administrator permissions on your Windows 7 computer. Doing so will enable your Windows 7 system to gain accessibility to the parts which are usually not allowed. To provide the administrator permissions, follow the 7 steps given below on your Windows 7 computer.
Quick Note: Before you perform this method to remove the update error, make sure that you are logged on to your Windows 7 computer as an admin.
1. Press the “Windows” key on your system’s keyboard.
2. Go to the option of “Control panel”.
3. Click on the option of “User accounts and family safety”.
4. Click on “Add or remove user accounts”.
5. Locate and click on the option of “Change the account type” on the left.
6. Press the radio button beside the “Administrator”.
When the administrator permissions have been granted to your Windows 7 computer, you can go ahead with installing the updates. Now, the updates will be installed without any problem.
Method 3: Perform SQL Command on Windows 7
Have you been seeing the message “error 0x80070643 failed to install msi package Windows 7” lately? If yes, then you should try to use the SQL command for getting access to the administrator permissions, thereby troubleshooting the Windows 7 update error. For performing this command, the 6 steps shown below will be very helpful.
1. Open “Notepad” on your Windows 7 computer and then enter the following text.
“EXEC sp_grantlogin ‘<Server_Name>\<Login_name>’ Go EXEC sp_addsrvrolemember ‘<Server_Name>\<Login_name>’, ‘sysadmin’ Go”
2. For providing the administrator permissions on your computer, enter the text given as follows.
“EXEC sp_addsrvrolemember ‘< Server_Name>\<Login_name>’, ‘sysadmin’ Go”
Quick Note: “Server_Name” refers to the name of the SQL server instance and “Login_name” refers to the group or user account”.
3. The third step involves saving this file. On the “C:\drive”, name it as “GrantPermission.sql”.
4. Next, launch the “Command Prompt” on your Windows 7 computer.
5. Enter the command given below in the “Command Prompt”.
“osql -E -i C:\GrantPermission.sql“
Quick Note: “<Server_Name> refers to the SQL server of your Windows 7 computer and the “<Login_Name>” refers to the user or group account for which these permissions are being provided.
6. Once the above steps have been performed, try to install the updates on your Windows 7 computer. The Windows install error 0x80070643 will not come in your way.
Thoughts in Closing
Did this post help you troubleshoot the 0x80070643 Windows update error in simple ways? If your answer is a yes, do mention it to us in the comment space below. We just love helping you with such error codes.
We also invite you to read quick fixes for the 0xc00000e9 Windows 10 error as well as awesome hacks to remove the 0x8000ffff Windows update error from your PC. Make the performance of your Windows system smooth with our guaranteed fixes!
