Creating your own File Transfer Protocol (FTP) has its own advantages. You can transfer large files through the public or private network with no restrictions. If you want to know how to set up FTP server on Windows 10, stick through this guide till the end.
Furthermore, we will be teaching you the procedure of Windows server FTP setup for multiple platforms or services. It includes Ubuntu, Filezilla, GoDaddy, Amazon EC2 Instance, and Mac.
The guide covers the following platforms for creating FTP Server. You can go through this step by step guide.
- The Procedure of Windows Server FTP Setup
- How to Setup FTP Server using FileZilla?
- How to Setup an FTP Server on Ubuntu?
- Part 1: Update the System Packages
- Part 2: Backup the Configuration Files
- Part 3: Install vsftpd Server
- Part 4: Create an FTP User
- Part 5: Allow FTP Server in Firewall
- Part 6: Connect to the Ubuntu FTP Server
- How to Setup FTP Server with GoDaddy?
- How to Setup FTP Server using Amazon EC2 on Windows?
- Part 1: Add Rule in the AWS Management Console
- Part 2: Install FileZilla
- Part 3: Configure FileZilla
- Part 4: Create FTP Account
- How Do I Setup an FTP Server on a Mac?
The Procedure of Windows Server FTP Setup
To set up an FTP server on your Windows computer, you are required to install and configure the FTP server site. For that, we will show you a step by step guide. Continue reading to know how to setup FTP server on Windows 10.
Part 1: Install Required Components for FTP Server
Windows 10 supports the FTP so it is very easy to set up the FTP server. However, there are a few components that are required to be installed on your device. To do so, you can access the Control Panel and follow these steps mentioned below:
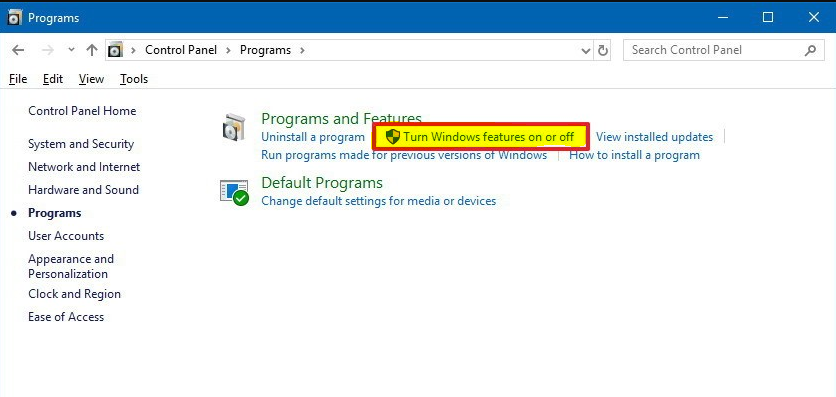
- Launch “Control Panel” on your PC.
- Go to “Programs”.
- Click on the “Turn Windows features on or off” located under the “Programs and Features”.
- Now, click on the “Internet Information Services” in order to expand it.
- Then, expand the “FTP Server” option.
- Place a checkmark on “FTP Extensibility” as well as “FTP Services” options.
- Now, click on the “Web Management Tools” and make sure that the “IIS Management Console” option is selected.
- Hit the “OK” and “Close” button.
After following these steps, you would have installed the components that are required for the Windows Server 2003 FTP server setup.
Part 2: Configure the FTP Server Site
Since the required components have been installed, you can now proceed with the configuration process. In this part, we will provide a step by step guide to build the FTP site, set up firewall rules, and allow external connections. You can also build a static IP address if required.
Part 2.1: Build the FTP Site
- Launch “Control Panel” on your PC.
- Click on the “System and Security”.
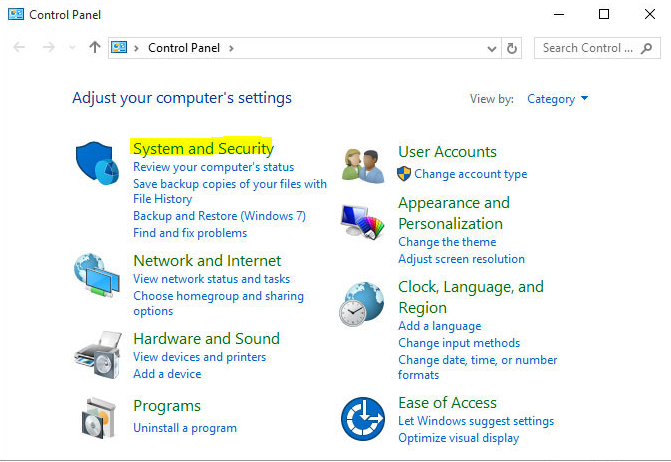
- Select the “Administrative Tool”.
- Click twice on the “Internet Information Services (IIS) Manager”.
- On the left, click right on the “Sites”.
- Then, choose the “Add FTP Site” option.
- Now, enter the short name for the FTP site server.
- Now, click the three horizontal dots located next to the “Physical path”. This is to find a folder you wish to use for storing your FTP files.
Note for you: If you choose the home folder as the default folder, the users will not be able to access the folder. In this case, you can make a new folder in the root on a different hard drive or system drive.
- Then, click on the “Next” button
- Use “Binding” setting selections.
- Place a checkmark on the “Start FTP site automatically”.
- Select the “No SSL” option in the “SSL” section.
Important Note: If your FTP server hosts sensitive data then it is suggested to use SSL to prevent a data transmission.
- Hit the “Next” button.
- Check the “Basic” option in the “Authentication” section.
- Click on the dropdown in the “Authorization” section, and select the “Specified users” option.
- Enter your email address for a local or Windows 10 account. This will allow you to access your FTP server.
- Now check both the permissions; “Read” and “Write”.
- Hit the “Finish” button.
Once you are done following these steps, your FTP site should be operated on your device. Now, you are done creating and configuring the FTP site server. Next to this, you are required to configure firewall rules.
Part 2.2: Allow FTP Server in Windows Defender Firewall
If you are running the Windows firewall on your PC, it is likely to block the FTP server. Therefore, you need to allow this service manually. On Windows 10, setup FTP server in the Windows Defender Firewall by following these steps:
- Open the “Windows Defender Security Center”.
- Go to the “Firewall & network protection”.
- Click on the “Allow an app through firewall” link.
- Hit the “Change settings” option on the top right.
- Now, place a checkmark for the “FTP Server” option.
- Also, check the “private” and “Public” boxes.
These steps will allow your FTP server to be accessible even from the local network. So, this is how you can allow your FTP server manually in the Windows Defender Firewall.
In case, you are using some third-party security programs then you should read the procedure on their website to add firewall rules.
Part 2.3: Allow External Connections
In this part, we will allow external connections so that your FTP server can be reachable from the local internet. For this, you can open the Transmission Control Protocol or Internet Protocol (TCP/IP) port number 21.
Note: To forward the port, the steps may vary as it depends on the firmware version. Hence, you should take support from the manufacturer.
To change the connection properties, you can do the following:
- Launch the “Settings” app.
- Go to the “Network & Internet”.
- Click on the “Status”.
- Select the “Change connections properties” option.
- Note down the “IPv4 DNS server” address. This is the address of the router.
- Now, launch the web browser.
- Enter this router IP address in the address bar.
- Hit the “Enter” key.
- Log in with your credentials.
- Then, open the page named “Port Forwarding”. You can find these settings under NAT, WAN, or Advanced settings pages.
- Here, add your new rule by following the information. This will forward the incoming connection to an FTP server from the local internet.
- Port range: 21
- Service name: Add a descriptive name for your port forwarding rule.
- Local IP: This is your FTP server IP address. This will be forwarding the incoming connections.
- Protocol: TCP
- Local port: 21
- Hit the “Add” button.
- Click on the “Apply” button.
Once you are done following these steps, the incoming connection would be forwarded to the FTP server. This will establish a networking session.
Part 2.4: Set up a Static IP Address
Most users transfer files on a regular basis. If you are one of those, it is suggested to set up a static IP address. This is because the IP address of your device may change in the future. To prevent yourself from configuring it repeatedly, you can simply add a static IP address. Here are the steps for that.
- Launch the “Settings” app.
- Go to the “Network & Internet”.
- Click on the “Network & Sharing Center”.
- On the left, select the “Change adapter settings” option.
- Click right on your network adapter and choose the “Properties” option.
- Choose the “Internet Protocol Version 4 (TCP.IPv4)” item.
- Hit the “Properties” button.
- Now, click on the “Use the following IP address” option.
- Mention the following IP settings:
- Subnet mask
- Preferred DNS server
- Default gateway
- IP address
- Click the “OK” and “Close” button.
When you are done following these steps, the IP address will not change. In addition, it prevents connection issues in the future.
This is the whole procedure of the Windows server FTP setup. The aforementioned parts have enlightened you about installation and configuring the FTP server on Windows 10 PC.
How to Setup FTP Server using FileZilla?
FileZilla is an FTP application itself. You can use FileZilla and connect it to other PCs using FTP. By using FTP, you don’t have to worry about its compatibility as it has standard protocols. In addition, it is supported by your operating system. So, if you want to set up a FileZilla server using FTP, we will teach you.
To set up an FTP server using FileZilla, you are required to install FileZilla and configure the FileZilla server on your computer. Let’s understand how to set up an FTP server on Windows server 2008 using FileZilla.
Part 1: Install FileZilla
The first thing to do is to install FileZilla. Once installed, you can then start following the steps instructed below:
- On the “FileZilla Startup Settings” screen, you can continue with the default settings. If preferred, you can modify the admin port. However, this port will be for administrators only, not FTP clients.
- The details will be filled automatically in order to connect to the localhost and port number.
- The password section will be blank here.
Once you are successfully connected to the server, you can continue configuring the FileZilla server.
Part 2: Configure FileZilla Server
Right after you connect to the server, you will see a window that contains some basic information related to the server. Here, you can perform the following steps:
- Firstly, create your “FTP” user account
- Click on the “Edit” option from the top menu.
- Select the “Users” option.
- In the “User” window, click on the “Add” button located on the right.
- In the “Add user account” window, enter your name.
- Click the “OK” button.
- Then, mark tick on the “Password” box and set a password.
- To share the directory, click on the “Shared folder”.
- Browse folders that you wish to share.
- To set the user’s permission, you can uncheck the “Delete” and “Write” boxes. This will not allow other users to change directories and files.
- Then, set the “Download Speed Limit”.
- Now, enable the “IP Filter”. This will prevent your IP address from connecting to the server.
This is how you can install and configure your FTP server using FileZilla. Since you have the FTP server, you can now allow Windows Defender Firewall to allow connections for FileZilla.
In case, you have installed FileZilla to a default location (C:\Program Files(x86)\FileZilla Server\FileZilla Server.exe) then you have to allow it to be in the exception list.
If it is required then you can forward port connection. This allows users to connect from outside of the local network.
How to Setup an FTP Server on Ubuntu?
An FTP server can also be created on Ubuntu. For the Ubuntu FTP server setup, there are a few items that are required such as an account with the sudo rights, terminal window, and apt package manager.
To set up an FTP server on Ubuntu, we will show you how to update system packages, backup the configuration files, install the vsftpd server, create an FTP user, allow FTP in Firewall, and connect to the Ubuntu FTP server.
Part 1: Update the System Packages
First of all, you need to update the repositories. For that, you can enter the following command in the terminal window. Once you do so, the system starts updating the repositories.
sudo apt-get update
Part 2: Backup the Configuration Files
It is always suggested to backup your files before you implement technical methods. To create a copy of your default files, you can enter the following command:
sudo cp /etc/vsftpd.conf /etc/vsftpd.conf_default
Once you do so, a copy of the configuration files will be created. Thereafter, you can create a vsftpd configuration file with the text editor:
$ sudo nano /etc/vsftpd.conf
Part 3: Install vsftpd Server
To use FTP on Ubuntu, you need to use vsftpd as it is recommended. Therefore, in this part, we will install vsftpd by following this command:
sudo apt install vsftpd
After installing it, you can launch it and enable it at the startup. For that, you can use these commands:
sudo systemctl start vsftpd
sudo systemctl enable vsftpd
Part 4: Create an FTP User
For the Ubuntu FTP server setup, you need to create a new user for the FTP account by following the command mentioned below.
sudo useradd –m testuser
sudo password testuser
After you are done creating a user name, your system will prompt you to enter the password for the test user account. Here, you can make a new sample file in the home account following this command:
sudo mkdir /home/testuser
Part 5: Allow FTP Server in Firewall
In case you are using an Uncomplicated Firewall, there are chances that it blocks FTP traffic. To open Ports 21 or 20 for FTP traffic, you can follow these commands:
sudo ufw allow 20/tcp
sudo ufw allow 21/tcp
Part 6: Connect to the Ubuntu FTP Server
As the last step, you can connect to the server. To connect to your FTP server, you can use the command mentioned below:
sudo ftp ubuntu-ftp
Here, you can add your system name in the replacement of ubuntu-ftp. Thereafter, you can log in with the test user name and password you have created just now. This way you can set up FTP server using Linux and log in to the FTP server on Ubuntu.
How to Setup FTP Server with GoDaddy?
GoDaddy allows you to set up the FTP server in different ways. Here, we will show you the procedure of creating an FTP server on GoDaddy (with limited access) and the GoDaddy hosting server.
Method 1: Setup FTP Server with GoDaddy
If you have limited access to your GoDaddy account and you wish to create an FTP server then the upcoming information is for you. Now, we will enlighten you on how to set up a free FTP server using GoDaddy’s limited access.
- Sign in to your “GoDaddy” account.
- Go to the ”Manage your Hosting”.
- Click on the “Files&FTP”.
- Then, click on the “FTP Users” menu.
- Click on the “ADD” button in the “Manage FTP Users” window.
- Add the preferred username.
- Click on the “Browse” button and pick the folder that you want the user to access.
- Enter the password.
- Click on “Actions” and go to “Details”. This will show you the details of each user.
These steps will help you to create your FTP account in GoDaddy even if you have limited access.
Method 2: Setup FTP in GoDaddy Hosting Server
If you wish to create an FTP account in GoDaddy hosting server, you can then follow these steps instructed below:
- Launch your GoDaddy hosting server.
- Go to the “GoDaddy cPanel”.
- Open the “FTP Account” menu.
- Fill the required details in order to create an FTP user account. It includes a username and password.
- Then, add your “Directory” so that the user can access it.
- Choose your “Quota” for uploading files.
- Once done, click on the “Create FTP Account” button.
After following these steps, you will see a list of FTP users. You can change the uploading quota, permissions, or delete the user if required.
How to Setup FTP Server using Amazon EC2 on Windows?
To set up FTP server on AWS, you are required to follow certain steps. For instance, you need to make changes through AWS Management Console, install FileZilla, configure FileZilla, and create a new FTP account. Below we will understand these with more clarity.
Part 1: Add Rule in the AWS Management Console
- Click on the “Security Groups” on the left.
- Choose the name for your security group.
- Click on the “Inbound” tab located in the small window.
- From the “Create a new rule” dropdown, select the “Custom TCP Rule”.
- In the “Port range” field, add 50000 to 51000.
- Use discretion in the “Source field”. Leave all the fields from 0.0.0.0/0 to allow all.
- Click on the “Add Rule”.
- Hit the “Apply Rule Changes”.
Part 2: Install FileZilla
- Download and install FileZilla Server
- Select the location to save the FileZilla Server installation file.
- Complete installation going “Next” or “I Agree” buttons.
Part 3: Configure FileZilla
- Click on the “Settings” located on the top left menu.
- Click on the “Passive mode settings” and add the custom port range (50000-51000) and IP (xx.xx.xxx.xx) which is the “Public DNS Name or Elastic IP of the instance.
- Press the “OK” button.
Part 4: Create FTP Account
- To create your “FTP” user account, click on the “Edit” option from the top menu.
- Select the “Users” option.
- In the “User” window, click on the “Add” button located on the right.
- In the “Add user account” window, enter your name.
- Click the “OK” button.
- Then, mark tick on the “Password” box and set a password.
- To share the directory, click on the “Shared folder”.
- Browse folders that you wish to share.
- To set the user’s permission, you can uncheck the “Delete” and “Write” boxes. This will not allow other users to change directories and files.
On your Amazon EC2 Instance, you can also disable Windows Firewall settings so that you can allow other connections to share files from your network. By doing so, your FTP server can be accessible even from the local network.
How Do I Setup an FTP Server on a Mac?
Mac has a built-in FTP server that is pretty easy to use. You can easily add files to FTP clients and grant permission for other users to access documents. If you want to share files using FTP and allow other PCs to share files from your system, you can do that in the following details:
Part 1: Share Files using FTP on Mac
- Click on the Apple icon located on the top left.
- Go to “System Preferences”.
- Click on the “File Sharing” box.
- Select “Options”.
- Click on the “Share Files and Folder using FTP”.
Part 2: Allow other PCs to Share Files
- Go to the “Finder” menu.
- Click on the “Go”.
- Select the “Connect to Server” option.
- Now, enter your name and password for your server.
This is how you can share files and allow other devices to share and copy files from your computer. However, there is a limitation with Mac FTP. Also, if you use @ in your username then you won’t be able to connect to the server.
Closing
File Transfer Protocol (FTP) is pretty easy to set up. Windows and Mac are the operating systems that have built-in FTP servers. All you are required to do configuration on your PCs. In this guide, we have talked about the FTP server setup in detail.
Moreover, we have provided more ways to set up an FTP account. You can use FTP on Ubuntu, GoDaddy, Amazon EC2 Instance, or use Filezilla to set up an FTP server.
Apart from this, if your DNS server not responding on Windows PC, you can go through this guide to find effective solutions.