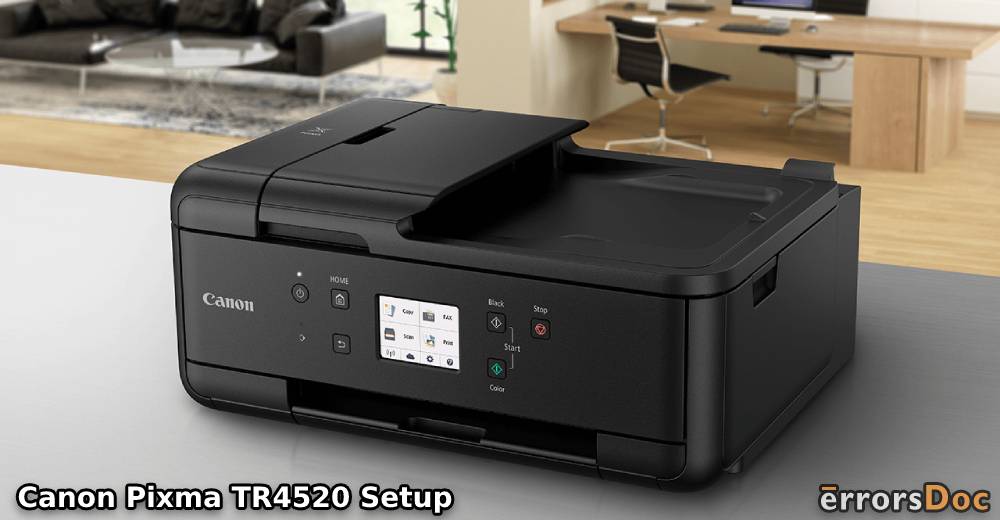
Are you looking forward to setting up your Canon TR4520 printer with your computer? Learn with us! If you are a new user of the Canon Pixma TR4520 Printer and need help to set it up, then this article will help you. Here, we are going to cover a number of ways to easily set up the Canon Printer TR4520.
Furthermore, you will learn to install Canon TR4520 drivers, place Canon TR4520 ink cartridges to print documents, and the procedure for the Canon TR4520 fax setup. Besides that, if you encounter a Canon TR4520 paper jam error, then we will teach you to fix that too.
Let’s get started!
- The Procedure of Canon Pixma TR4520 Setup
- Download Canon TR4520 Driver for Windows
- Download Canon TR4520 Driver for Mac
- How to Set up Canon TR4520 Printer?
- Method 1: Canon Pixma TR4520 Setup with USB
- Method 2: Canon Pixma TR4520 Setup Wirelessly
- Method 3: Canon Pixma TR4520 Setup with LAN Connection
- How to Print with Canon TR4520 Printer?
- How to Fax with Canon Pixma TR4520 Printer?
The Procedure of Canon Pixma TR4520 Setup
To set up the IJ Start Canon TR4520 Printer, you need to take care of certain responsibilities. For instance, before setting up the IJ Start Canon TR4520, you need to have compatible drivers installed on your computer. So here we will first download and install the Canon TR4520 driver.
Note: The Canon TR4520 manual and driver can be used as a medium between your computer and printer. It communicates well with print operations.
You can download the Canon Pixma TR4520 driver for Windows and Mac computers. Let’s know how to download and install the drivers on both the devices.
Related Topic: Canon Pixma TR4522 Setup Guide
Download Canon TR4520 Driver for Windows
TR4520 Canon drivers can be downloaded and installed on all Windows versions from Windows 7 to Windows 10.
Note: For the installation, you need to make sure that your computer is connected to the internet.
- Visit the manufacturer’s website.
- Download the file.
- Go to the location where the file is downloaded.
- Double-click on the .exe file to decompress it.
- Follow the on-screen instructions to install the file.
Download Canon TR4520 Driver for Mac
The TR4520 Canon drivers can be downloaded and installed on Mac OS X v10.10 to Mac OS X v10.14 operating systems in 6 steps. These are as follows.
- Go to the “Manufacturer’s website”.
- “Download” the file.
- Go to the location where the file is downloaded.
- Double click on the downloaded file. Then, mount it on “Disk Image”.
- Now, double-click on the “Setup” file in order to launch it.
- Follow the on-screen instructions to install the file.
After downloading the Canon Pixma TR4520 manual and drivers, you can proceed with the Canon TR4520 setup procedure.
How to Set up Canon TR4520 Printer?
Since now you have the driver on your operating system, the next step is to set up the printer. The Canon printer TR4520 can be set up in three different ways which are as follows.
- USB Connection
- Wireless Connection
- LAN Connection
Now, we will understand these three methods with a step-by-step guide. Now, let’s set up the Canon Pixma TR4520 Wireless All in One Printer using these great methods.
Method 1: Canon Pixma TR4520 Setup with USB
Setting up your Canon Pixma TR4520 using a USB is the simplest of all procedures. Remember If you don’t have a Canon Pixma TR4520 driver then make sure you download and install them on your computer before performing this method.
After installing the drivers successfully, the software may prompt you to choose the connection method. At this point, you can select the USB connection and configure the setup.
Then, you can connect the Canon Pixma TR4520 USB cable to both your computer and printer. This will establish the connection. And, then you can check to print the page to examine the USB connection.
Method 2: Canon Pixma TR4520 Setup Wirelessly
Another method to start your printer is by using a wireless connection. To set up your Canon Pixma TR4520 Wireless All in One Printer, you have to make sure that your TR4520 Canon printer is powered on. Then you can follow these steps.
- Press the “Menu” or “Wireless Connect” button for about 3 seconds.
- Load the “CD” into the drive and run the driver file.
- Click on the ”Start Setup” option.
- Now, read the network security notice and tap the “Next” button.
- Select your “Region” name.
- Click on “Next” and press the “Yes” button.
- Hit the “Agree” button and confirm the wireless connection.
- Once the connection is established, click on “Next”.
- When the driver installation occurs, click on the “Start” button to start the test print.
- Choose the additional software to launch and click on “Next”.
- Then, hit the “Exit” button to finish the process.
Method 3: Canon Pixma TR4520 Setup with LAN Connection
Wireless Direct is the third great way to connect your Canon printer to the network. This method requires you to remember the password of your network (to which you will connect the printer). Also, this will change the SSID and other security settings automatically.
To connect your printer via a LAN connection, you can follow the steps mentioned below:
- Power on your Canon printer.
- Tap on the “Setup” icon available on the home screen of the printer.
- Choose the “Setting” option.
- Go to the “Device Settings”.
- Click on the “LAN Settings”.
- Tap on the “Wireless Direct” option and select the “On” option to enable it.
- Your screen may prompt you for making your password visible. Choose “Yes” or “No”, as per your preference.
- You will see the list of available wireless connections. Choose the network to which you want to connect your printer.
- Turn on the wireless connection on the device.
- Select the series name of the printer from the list. It will display the prefix “DIRECT”.
- At this point, enter your password. That will be all! Now, you can use the functions of the IJ Start Canon TR4520 printer.
How to Print with Canon TR4520 Printer?
Now that your IJ Start Canon TR4520 Printer has been successfully set up, you would be looking forward to printing. Do you know the right way to do it? You can know it in this part of the guide.
To print with this device, you are required to load the sheets in the printer and then perform a little procedure. To understand this procedure better, you can go through the following steps.
- Power on the printer.
- Open the input tray.
- Load (A4) sheets in the input tray. Make sure you check the alignment of the papers.
- Install the Canon Pixma TR4520 driver on your computer.
- Select the “Print Settings” option.
- Click on the “Apply” button.
- Select the printer paper size and other features.
- Choose a printing quality standard. Now, the printing process will begin.
Note: It may help you to know that If you select the print operation with your current setting operation, then the quick settings will be saved automatically.
How to Fax with Canon Pixma TR4520 Printer?
Faxing via printer can also be done using a Canon printer. So, now we will follow the procedure of the Canon TR4520 fax setup. Let’s read it now:
- “Power on” your printer.
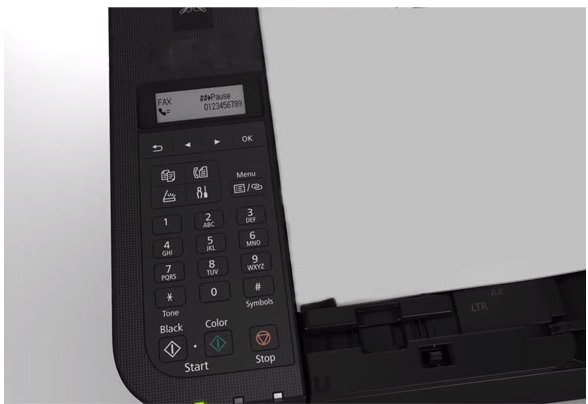
- Press the “Fax” button. This will display the “Fax Standby” screen.
- Now, place your document on the platen that you want to fax.
- Change the “Scan Contrast” and “Resolution”.
- Now, use the numeric keypad and enter the “Fax Number” of the concerned recipient.
- Tap the “Color” button to print the fax with colored prints. For the black and white print, you can tap the “Black” button.
This is how you can set up fax in your Canon printer. If you want to set up or reset the ink cartridge for sending the fax, then you can replace the ink cartridge. Let’s know more about this in the following section.
Canon Pixma TR4520 Ink Cartridges Setup
There are times when you need to replace or reseat ink cartridges. This job should be done carefully as it can affect the printing. Now, let’s learn the easiest procedure for Canon Pixma TR4520 ink Cartridges setup.
Important: Before learning to set up an ink cartridge, keep the following things into consideration.
- Do not touch the electrical contacts or the print head nozzles on the cartridge. Or else the print machine may stop working or printing.
- The machine from inside may be stained with ink. Be careful when you replace the ink cartridge as it may stain your clothes or hands.
- Do not stop the cartridge holder when it moves. Also, do not try to move the cartridge holder forcefully.
- Do not touch the metallic or other parts inside the printing machine.
- Discard the empty cartridges.
To replace the ink for Canon TR4520, you can follow the steps mentioned below.
- Turn on the printer.
- Open the front cover. This will also open the paper output tray.
- Remove the paper in the cassette.
- Open the paper output cover.
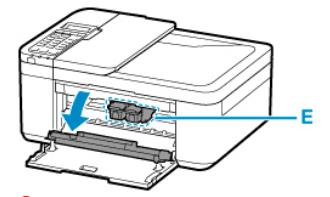
- Now, the cartridge holder will move to its replacement position. Make sure that you do not touch the holder until it stops.
- Push down the ink cartridge until it clicks.
- Now, take out the cartridge and take the new one. Make sure you remove the protective tap gently from the package.
- Now, insert the ink cartridge (at a slant) into the cartridge holder.
- The color cartridge moves to the left whereas the back cartridge goes on the right.
Note: Make sure the cartridge does not touch the electrical contacts when you insert it.
- Now, push the ink cartridge in and up until it fits the place.
Note: Check if the ink cartridge is installed correctly. It should evenly line up with other cartridges. If both the cartridges do not line up properly, then the printer will not be able to work.
- Now, close the paper output cover and start printing.
This way you can easily replace the ink cartridge on your Canon printer and start printing freely.
Fix Canon TR4520 Paper Jam Issue
There can be situations when the paper becomes jammed in your printing machine. If this problem occurs with your machine too, then it can be resolved by following these ways.
Advice: Before you begin, make sure that all the faxes are received or sent successfully. Unplugging the printer in-between will stop the fax in progress or delete the fax stored in your printer’s memory. Also, when you “Stop” the printer, the paper becomes jammed.
To fix this Canon TR4520 paper jam issue, you can do the following:
- Power off the printer and then unplug it.
- Now, open the paper output cover and remove the paper (if any) from the cassette.
Note: Don’t touch the clear firm as it could damage your printer.
- Check if the paper is under the cartridge holder. If yes, then you can hold the top and then slide it to the far left or right to remove the paper.
- Hold the paper firmly with both hands and pull it out carefully. Make sure it does not tear up. If it tears, then you can remove it from the ink cartridge holder.
- When all the pieces of paper have been removed, close the paper output cover.
- Plug the printer back and power it on.
Now, you can reload the paper correctly. If your printer still shows the paper jam error, then there must be torn paper inside. Check the printer again and remove the paper entirely.
Summing up!
So you see, it is quite easy to set up and print with this model of the Canon printer. In this guide, we discussed three kinds of methods to install the Canon TR4520 drivers, replace Canon TR4520 ink cartridges to print documents, and the procedure for the Canon TR4520 fax setup. We also covered the solutions for fixing the Canon TR4520 paper jam error.
Hopefully, you will find this guide useful!
Would you like to read more such guides? You can check out this guide for Canon Printer Troubleshooting. It’s a must-read!